Pages

April 30, 2012

Broccoli Chicken Divan


About a year after I had my son I decided to try the Atkins diet to help get the baby weight off.  That diet worked very well for me back then, but it's not something I would do forever.  Anyway, I was always searching for low-carb recipes, and came across this one.  I was excited about this particular recipe because a lot of broccoli chicken divan recipes have mayonnaise in them (yuck!), and this one does not (score!).

It was love at first bite for me.  I have been making this dish regularly for the past 13 years, and I never get sick of it.  It's one of those handy one dish meals that does not take a lot of time to put together, so it's perfect for a weeknight meal.  Pretty much everyone who eats this loves it....well, except my son, but that's only because he's not crazy about broccoli.  


Broccoli Chicken Divan


10 oz package frozen chopped broccoli, cooked and drained
2 chicken breasts, cooked and cut into bite size pieces
1 (10.75 oz) can condensed cream of broccoli soup
1/2 cup milk
1 cup shredded cheddar cheese
1 tbsp butter, melted
2 tbsp bread crumbs

Preheat oven to 400. In 5x7 baking dish arrange cooked broccoli. Add a layer of cooked chicken. Mix soup and milk together and pour over cooked chicken. Sprinkle with cheese. Combine melted butter with bread crumbs and sprinkle over cheese. Bake for 20 minutes or until hot and bubbly. Serves 4.

April 29, 2012

Banana Chocolate Chip Muffins


I had a bunch of over-ripe bananas sitting on my counter, and half a bag of mini chocolate chips needing to be used up, so I quickly decided to make banana chocolate chip muffins.  My son, who will be 14 soon, has an endless appetite lately and it can be a challenge at times to keep up with him!  

As I was preparing to make the muffins my son asked what I was making, and when I told him all I got for a reaction was "Oh".  Next, my husband walks in and wants to know what I'm making and after I told him he says "Come on, why can't you just make regular old banana muffins?  Can you please make a few without the chocolate chips?"  I let out a sigh, but agreed to accommodate his unadventurous taste buds.   


I have to chuckle at the end result of all this.  After making 4 out of the 12 muffins without chocolate chips, my husband decides to try a muffin with the chocolate chips....his reaction "Mmmm, these are actually really good!"  For my son, I gave him 2 muffins to bring to school for snack and he came home that day and dug into the muffins, declaring "I think these are officially my favorite muffins!" 

Banana Chocolate Chip Muffins

1 and 1/2 cups flour
1 tsp baking powder
1 tsp baking soda
1/2 tsp salt
3 large bananas, mashed (or 5 smaller ones)
3/4 cup sugar
1/3 cup butter, melted and slightly cooled
1 egg
1 tsp vanilla
1 cup mini chocolate chips

Preheat oven to 350 and spray muffin tin with non-stick cooking spray.  In a bowl, sift together flour, baking powder, baking soda and saltIn a separate bowl combine bananas, sugar, egg, vanilla and melted butter.  Add the flour mixture to the banana mixture and stir just to combine, then fold in the chocolate chips.  Divide batter evenly into the muffin tin, and bake for 25-30 minutes, or until toothpick comes out clean.

April 28, 2012

Not Your Average Potato Salad


First off, let me start by saying that I have a strong aversion to mayonnaise.  I just don't like it, although I have become a little more tolerant of it in the last 10 years.  The first summer we lived in Vermont my husband wanted to have a cookout and really wanted me to make potato salad, which at the time was something I had never made, nor ate, because of the mayonnaise.  So he suggested putting it together with me so he could show me how he liked it.  The first step was to make a few hard boiled eggs.....huh???  Eggs?  Why would you put eggs in potato salad I asked?  His answer:  "That's how my mom made it and that's how I like it".  OK, but I thought it was weird.  As we put it together I was intrigued at the ingredients he was putting into it, but before he started adding the mayo I warned him that I would not eat it if it was going to be loaded with mayonnaise.  He assured me he doesn't like tons of mayo in it either, and the end result was a very good potato salad.....one I ate, and actually enjoyed!

About a year later, when I was working in the kitchen at my son's school, potato salad was on the menu.  "Ugh" I thought....I really didn't want to make potato salad for 200 kids and have to touch and smell all that mayonnaise!  I complained about it so much that my co-worker Patti said "Oh don't worry, I'll help you!"  She also added hard boiled eggs, so I guess my husband wasn't the only one.  So, as we were putting it all together (she had one pan of it and I had another) she started to sprinkle some dried dill onto hers.  "What are you doing???" I asked!  Apparently she makes hers with dill.....I had never heard of such a thing!  Without even trying it I decided I wouldn't eat it (stupid I was).  Then I challenged her to a contest - she could put dill in her pan and I'd keep my pan without it and we'd see whose got eaten up first.  I was baffled later to find that all of her's was gone, and I still had some left.  There was just enough along the side of her pan for me to scrape up a bite to try, and I was amazed at how much I liked it! The addition of the dill really gave it that extra something that set it apart from mine.....nice job Patti!  

Here is my version of potato salad, using all the ingredients from my husband and from my co-worker Patti, but tweaked to my personal liking  - meaning as little mayo as possible :)  I now love potato salad (well, mine anyway) and it is a summer staple for us at all cookouts!  If you try this recipe, DO NOT LEAVE OUT THE DILL!  Trust me, it makes a difference and you will like it!!!!
 
Not Your Average Potato Salad 
7 potatoes or 5 lb bag(I use Russet)
1 1/4 cups mayonnaise
2 tsp mustard
1/2 tsp onion powder
1/2 tsp garlic powder
1 tsp dried dill
1 1/2 tsp salt
3/4 tsp pepper
4 hard boiled eggs, chopped

Peel potatoes and cut into cubes.  Boil until tender, and let cool completely.  Add the rest of the ingredients and stir until well combined.  Adjust any of the seasonings to your taste - may need a little more or less depending on your own preferences.  Serves 8-10.

April 26, 2012

Linguine al Tonno (aka: Linguini with Tuna Sauce)


Linguine with tuna sauce was my most favorite thing to eat growing up.  Every time my mom would ask me what I wanted for dinner I would say "tuna sauce", every birthday when she'd ask me what I wanted for my special birthday dinner I would say "tuna sauce"...you get the idea.  Then I went off to college and didn't get home much after that, so the opportunity to have tuna sauce became few and far between.  Eventually I got married and moved to Vermont, and since I never learned how to make it myself, it's been 10+ years since I've had it.

For the last few years, every now and then I would tell my husband that I was going to make it, and he would laugh and make fun of me.  Since he's never had tuna sauce, for him the idea of a tomato sauce with tuna in it sounded disgusting.  "Why would anyone eat that?" he always asks me.  I don't know if a lot of people out there eat it, but I know I grew up on it.  My mother is only half Italian, but I know for sure there were other Italians in our town who ate it.  I would tell him this and again he would make fun of me and suggest I was making it up (this coming from a guy who likes banana & bologna sandwiches).  However, my son is right there with my husband and thinks tuna sauce sounds disgusting.

Since neither of them seemed interested in trying tuna sauce I never made it.....until now.  It was so delicious, just how I remembered it!  Ahhh, it brought back fond memories from years long gone.  However, dinner didn't go the way I had hoped - I really thought they would eat it and say "This is actually good".  Alas, that's not quite how it went.  Instead my husband laughed, and I mean harder than I've ever seen him laugh (with tears running down his face), all through dinner!  He ate it all though, and said it wasn't bad....while laughing.  Even my son was baffled by all the laughter - he kept asking what was so funny and wanted to know if my husband was on drugs.  He continued to laugh long after dinner was over, and as you know laughing can become infectious, so I began laughing too!  I think we completely freaked my son out :)

The next day (since I didn't want to evoke more fits of laughter) I asked them both what they thought of the tuna sauce.  My son said it was alright, and while it wasn't his favorite he'd eat it again.  My husband said it wasn't bad but would prefer I didn't make it again, BUT if I did he'd eat it.  I'm not really sure what to make of that answer, so if I ever make it again it won't be for a while!  Although, my mom always said "tuna sauce is an acquired taste", so I'm thinking maybe they need to be exposed to it several more times and maybe eventually they will like it as much as I do :)

Linguine al Tonno


1, 28 oz can San Marzano peeled tomatoes, pureed in food processor
1, 6 oz can tomato paste
1, 5 oz can tuna packed in oil
½ onion, chopped
1-2 cloves garlic chopped (about 1 tsp)
¼ cup red wine
1 tsp sugar
½ tsp dried Italian seasoning
Pinch salt & pepper, or to taste
2 tbsp olive oil

Heat olive oil on medium-low heat in bottom of medium saucepan.  Add the chopped onion and sauté until translucent, about 10-15 minutes.  Add the chopped garlic and sauté for two more minutes.  Add the can of tuna, with the oil, to the pan and stir while breaking up the tuna.  Let this sauté for about 5 minutes.  Add the pureed tomatoes to the saucepan along with the tomato paste, wine, sugar, Italian seasonings and salt & pepper.  Stir to combine.

Simmer on medium-low heat for about an hour, then turn down to low until you are ready to eat. You can keep it on low heat for a couple hours if you like – sometimes when I make sauce I will turn it off after it’s simmered on medium-low for an hour and let it come to room temp, then turn it back on low later for 1-2 hours.  Serve with linguine or whatever kind of pasta you prefer.

April 24, 2012

Cinnamon Chip Muffins


One day I was going through my cabinets to make a mental log of what I had, and what needed to be used up and I came across a bag of cinnamon chips.  I honestly I have no idea why I bought them to begin with...there must have been some recipe I had in mind to try but never got around to it!  So, with school snacks for my son in mind, I decided to make cinnamon chip muffins.  

The first time I made these I did not think to put a topping on them, and I thought they turned out a little bland.  However, my son and husband liked them anyway so I figured I'd keep the recipe but next time add some kind of topping to make them a little more exciting.  I decided to go with a streusel topping, which worked out really well.  My family thought they were really good and gobbled them right up!  I might still play with the topping a little, but this recipe is a keeper for us.  NOTEIf you exclude the cinnamon chips and topping, this muffin recipe is a great base for any filling you want to add. 


Cinnamon Chip Muffins

2c flour
¾ cup sugar
3 tsp baking powder
½ tsp salt
1c milk
1 egg
¼ vegetable oil
1 tsp vanilla
1cup cinnamon chips

Streusel Topping:  Add 1/4 cup cold butter, ¼ cup flour and ½ cup sugar to the bowl of a food processor and pulse until it forms a fine crumb.

Preheat oven to 400, and spray muffin tin with cooking spray.  In a large bowl stir together flour, sugar, baking powder and salt, making a well in the center.  In a separate bowl, beat egg together with the milk, oil and vanilla.  Pour the egg mixture into the well of the flour mixture, and stir until just combined – do not over mix, batter will be lumpy.  Stir in cinnamon chips and divide batter equally into the muffin tins.  Top with the streusel topping and bake for 25 minutes, or until a toothpick comes out clean and muffins are golden brown.  

April 22, 2012

Island Pork Tenderloin


I often find myself struggling to find new ways to prepare chicken and pork.  I get soooo bored with the usual options and so I will search and search to try and find something that sounds interesting.  Some are hits with my family, but I have to admit most are just OK, especially when it comes to chicken.  

One day I was going through a stack of recipes I'd pulled from various cooking magazines over the years and came across this one for Island Pork Tenderloin from Gourmet magazine.  The combination of ingredients sounded intriguing, and I knew I had a pork tenderloin in my freezer that needed to be used up, so I made up my mind to try it.  It seemed to me that Gourmet magazine is a pretty trustworthy source so I was excited to see if we would all like it.

Can I just tell you that I LOVE THIS DISH!  This pork blew my mind - it is so full of flavor.  I can't get over how the strange combination of ingredients come together to make the most delicious pork ever!  This is what you want to make when you have company (as long as your guests don't mind a things being a little spicy) - this pork will wow your guests!

Island Pork Tenderloin (adapted from Gourmet Cookbook)

For spice rub:
2 tsp salt
½ tsp pepper
1 tsp cumin
1 tsp chili powder
1 tsp cinnamon
2 pork tenderloins (2 ¼ - 2 ½ lbs total) trimmed
2 tbsp olive oil

For Glaze:
¾ cup packed dark brown sugar
2 tbsp finely chopped garlic
1 tbsp Tabasco

Stir the spice rub ingredients together in a small bowl and rub all over the pork.  Heat oil in ovenproof 12-inch heavy skillet over medium high heat.  Brown pork, turning occasionally, about 4-5 minutes total.  Remove from heat, but leave pork in skillet.

Stir together brown sugar, garlic and Tabasco in a small bowl.  Pat the mixture on top of the pork.  Place skillet in the oven at 350.  Roast until thermometer inserted diagonally into the center of each tenderloin registers 140 degrees, about 20 minutes.  Let pork stand in skillet, loosely covered with foil for 10 minutes.  

April 21, 2012

Individual Potato Gratins


I saw Melissa d'Arabain make these individual potato gratins on the Food Network a couple of years ago and I thought "Oh, what a great idea!"  If it were just me I was cooking for I wouldn't bother making potatoes, as I mostly try to keep my carbs down.  However both my husband and son are meat and potatoes kind of eaters.  So I think that's why this dish appealed to me so much - it's not a whole pan of potatoes, instead you make only what you need.  Genius!

However, every time I make this my husband asks me "Why don't you just make a whole big pan of it?"  I don't really have a good answer for that, other than I don't want to have a ton of left overs.  Both my husband and son are not big on eating left overs, so I often find myself being the only one finishing off whatever left overs we may have, and potatoes are just not what I want to eat everyday for a week!  Throwing food out is not an option for me....I just won't do it.  So, for our little family of three I think this dish just makes sense.  Besides, aren't these little potato gratins the cutest things you've ever seen???

Individual Potato Gratins (by Melissa d’Arabian)

1-2 very large russet potato, thinly sliced
½+ cup grated swiss/gruyere cheese
1/4 of an onion, thinly sliced
Salt and pepper
1/2 cup heavy cream (can substitute half & half)

Preheat oven to 375. Spray a 6 muffin tin with vegetable spray. Layer potato slices, cheese, onions into each cup. Season with salt and pepper, and top each with 1-2 tbsp of heavy cream. Cover with foil and bake for 50-60 minutes or until potatoes are tender, removing foil halfway through cooking time.

April 19, 2012

Sun Dried Tomato Butter


Years ago we went to southern California to visit my family.  While there, we stopped in San Diego one evening and ate dinner at a restaurant that was like a fish market.....actually, that might have even been the name of the place.  It was a fabulous place, right on the water, and we had an amazing dinner.  But the one thing that stood out for me was the butter they served with their rolls - it was sun dried tomato butter.  Now, before you disregard this recipe, please note that I myself am not a fan of sun dried tomatoes.  So it was shocking, especially to me, how much I liked this butter!

After we got home I decided to try to recreate that butter.  It may not be exactly like that restaurant, but this is definitely close.  My son loves this butter.....once he even suggested I make some rolls just so he could have this butter!  Give this recipe a try.  It's a nice change from ordinary butter, and it's super easy to throw together.  Make it when you have company over for dinner - I promise your guests will be impressed!


Sun Dried Tomato Butter

one stick salted butter, softened
1/2 tsp minced garlic
1 tbsp sun dried tomatoes, chopped
pinch of salt & pepper

Add everything to the bowl of a food processor and pulse to combine. 

April 17, 2012

Oatmeal Cookies


Finding what I think is the perfect oatmeal raisin cookie recipe has been a challenge for me over the years.  I think it's because there is a little local sandwich shop that serves all their sandwiches with a cookie, and their oatmeal raisin cookies are soooooo good.  It's a dense, chewy cookie with what seems to me to be ground oats because the oats are barley noticeable.  So, for years I have been trying to replicate that cookie and I still have not quite figured out the right combination of ingredients!   

Oatmeal raisin cookies are my husband's favorite, so the other day I decided to give a new variation of ingredients a try...however, almost halfway through making them I realized I didn't have any  raisins- UGH!  Oh well, I guess plain oatmeal cookies would have to do.  In the end it worked out just fine because both my husband and son said they thought these cookies were really good - go figure!  I thought the fact that my son liked them was interesting because oatmeal cookies are not his favorite, so I quickly decided this recipe is a keeper.  While I agree that these cookies are quite tasty, my quest to replicate that oatmeal raisin cookie will continue......


Oatmeal Cookies

1/2 cup white sugar
1/2 cup brown sugar

1/2 cup unsalted butter, softened
1/4 cup shortening
2 tsp vanilla extract
1 egg
1 cup plain flour
1 1/4 cup rolled oats
1/2 tsp baking soda
1/2 tsp baking powder
1/2 tsp salt


Preheat the oven to 350 and spray your cookie sheets with cooking spray.  In a blender or food processor, grind up the oats to your desired consistency (I like to have a little oats still visible) and place in a bowl.  To the oats add the flour, baking soda, baking powder and salt and set aside. 

In the bowl of an electric mixer, beat the butter and both sugars until light and creamy. Add the egg and vanilla, and mix to combine.  On a low speed, add the flour and oatmeal mixture and stir just to combine.

Drop large tablespoons of dough onto the cookie trays. Bake for 8-10 minutes, or until the edges are lightly golden.

April 15, 2012

Perfect Cornbread


It's almost time.....I feel like we've been waiting forever.  One more day and we get to see BRUCE (Springsteen) live!!!!!!  I am sooooo excited!!!!  Bruce is one of the only singers that my husband and I both like, so when I heard he was going on tour I knew I had to get tickets.  It will be nice to get away, even if it's just for one night, with my husband to see one of the most amazing performers ever.  Have I mentioned how excited I am????!?!?!? BRUCE :)

Finding a good cornbread recipe is not easy.  Most are too dry, some are too sweet and some don't have the right cornmeal to flour ratio.  I have tried tons of cornbread recipes, none of them living up to my standard for the perfect cornbread.  Then finally I came across this recipe that to me made the perfect cornbread.  The only negative thing about it was that it was on the sweet side, so after a few modifications I think I've got the perfect cornbread. 


Perfectly Moist Cornbread 

1 cup all-purpose flour
1 cup cornmeal
½ cup sugar
2 ½ tsp baking powder
1 tsp salt
1 cup milk
1/3 cup vegetable oil
1 egg 

Preheat oven to 375, and spray an 8x8 baking dish with cooking spray.  In a large bowl combine all dry ingredients.  Add the egg, milk and vegetable oil and stir until just combined.  Pour batter into pan and bake for 25-30 minutes, or until toothpick inserted into the center comes out clean.

April 13, 2012

Creamed Spinach


Happy Friday the 13th!  This Easter I decided to try and make creamed spinach.  I really love creamed spinach, but I have never attempted to make it at home....not sure why!  Probably because I thought I was the only one who would like it.  When I mentioned to my husband I was making it to go with Easter dinner he didn't seem impressed, but I think that's because he had never tried it before.  Normally I don't pick a new recipe to try for a holiday meal in case it turns out to be a disaster.  This year however, I was pretty confident it would turn out just fine.

Lucky for me, everyone really like it!  I am thrilled to have found another side dish that my family is happy to eat.  Spinach can be bland, and I'm sure that's the thought that was going through my husbands mind when I mentioned making it.  This recipe, adapted from Ina Garten, is anything but bland.  Another recipe to add to my collection - YAY!

Creamed Spinach

1 large onion, chopped
4 tbsp butter
¼ tsp nutmeg
¼ cup flour
3 lbs (5, 10 oz packages) frozen chopped spinach, defrosted & well drained
2 cups milk
1 cup heavy cream
1 cup grated Parmesan cheese
½ cup grated Gruyere cheese
Salt & pepper to taste

Preheat the oven to 400 degrees. 

Melt the butter in a sauté pan over medium heat and add the onion and sauté until translucent, about 15 minutes. Add the flour and nutmeg and cook while stirring, for 2 more minutes. Add the cream and milk and cook until thickened. After squeezing out as much liquid as possible from the spinach, add it to the sauce and stir to combine. Add 1/2 cup of the Parmesan cheese and mix well. Season with salt and pepper to taste. 

Transfer the spinach to a baking dish and sprinkle the remaining 1/2 cup Parmesan and the Gruyere on top. Bake for 20 minutes until hot and bubbly. Serves 8. 

April 11, 2012

Candied Pecans

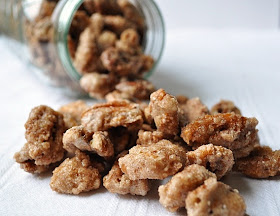
A very dear friend of mine passed away this week, sudden and expectantly.  She was the best person I've ever known....and I really mean that - she always saw the good in everyone, was always positive, always had a kind word, always there to lend a hand, and NEVER swore (that always surprised me because I've never met anyone who really never swore).  I worked with her for five years in the kitchen at the school where I used to be a cook, and I will cherish every minute I ever had with her.  Do you ever feel like you were just meant to meet some people in your life?  That they were put in your path because there was something about them or some lesson that you needed to learn from them?  That's how I always felt about my dear friend Patti - like I was meant to know her because she had important lessons to teach me.....and that she did, both in life and in the kitchen.  I learned so much from her and she will be in my heart forever.

This recipe for candied pecans comes from another co-worker in that kitchen where I used to work, Jackie.  Every year for Christmas Jackie would give each of us a basket filled with goodies to take home and share with our families.  I LOVED the candied pecans, and I made sure to get the recipe from her before I left that kitchen!  Warning - they are addicting, once you start eating them you won't be able to stop.  Jackie and my dear friend Patti who passed away were besties, so it's only fitting that I share this recipe today.  The three of us had many laughs in that kitchen, and both of them are on my mind today......so excuse me while I go and try to console myself by stuffing my face with these pecans!  RIP Patsy ♥


Candied Pecans

3 tsp cold water
1 egg white
1 lb pecans
3/4 cup sugar
1 tsp cinnamon
1 tsp salt

Spray a cookie sheet with cooking spray, and preheat oven at 225.  Beat water and egg whites until frothy.  Stir in pecans and mix well until pecans are all coated.  Combine sugar, cinnamon and salt.  Add to pecans and mix well.  Spread on cookie sheet and bake for 1 hour.  Stir halfway through.  Allow to cool completely before storing in an airtight container.

April 10, 2012

Homemade Caramel Sauce


I love Scrabble.  I might even be borderline obsessed with playing it.  I just beat my 13 year old son and I can't help but gloat just a little.  Is that bad???  Maybe that's why no one ever wants to play with me!  I'm constantly begging for someone to play with me and they are constantly turning me down.  However, now that I have a Kindle I can play against the Kindle anytime I like....wonder if that's why my husband bought it for me.

OK, on to caramel sauce.  As much as I have a bit of a sweet tooth, I am not much in to candy making or making anything where I have to use a candy thermometer.  Then one day I was watching "Dessert First" on the Food Network and Anne Thornton was making salted caramel banana cream pie.  It looked sooooo good so when my husband recently asked for a banana cream pie I knew I had to try that recipe.  The end product was delicious, however, truth be told I didn't care for her recipe & cooking method for the custard/pudding part of the pie.  But once it was all put together it didn't matter that the texture for the custard/pudding wasn't perfect.  The caramel was by far the star of this dish. 

When I tried the caramel sauce I was floored by how different it tasted from the stuff you buy in a jar at the store.  The caramel flavor was so intense...exactly how caramel SHOULD taste.  It actually makes me sad to think that I wasted all these years buying it!  There is no turning back now - I will from this day forward make my own.  Thank you Anne Thornton! 

Caramel Sauce (by Anne Thornton

1 1/2 cups sugar 
1/3 cup water
1 1/4 cups heavy cream

Place water and sugar in medium saucepan on medium-low heat. Cook until sugar dissolves, 5-10 minutes - DO NOT STIR. Turn the heat up to medium and boil uncovered until the sugar turns to a chestnut brown color, about 5-7 minutes (350 degrees on candy thermometer if you have one - I just used my meat thermometer, making sure it didn't touch the bottom of the pan). Swirl the mixture gently every now and then. Watch closely at the end because it will go from caramel to burnt quickly.

Turn off the heat and slowly add the cream (you may want to stand back a little to avoid getting splattered). The cream will bubble violently and the caramel will solidify - don't worry this is normal!

Simmer on medium-low heat, stirring constantly until the caramel dissolves and the sauce gets nice and smooth (about 2 minutes). Allow to cool to room temperature which will take about 4 hours. The sauce will thicken as it cools.

April 9, 2012

Homemade English Muffins


As I've mentioned before, I try to make as many things as I can from scratch.  But I will admit that the thought of making english muffins scared me.  I didn't think it was possible that they would actually come out like the kind you buy in the stores.  However, I saw several different recipes for english muffins and the pictures looked like the real thing so I figured I'd give it a try. After trying a few different recipes I did find one that was exactly like store bought english muffins....right down to the nooks and crannies we all love.

I no longer buy english muffins.  I make a batch of these about once a month, leave a couple out then freeze the rest.  I've been doing this for about a year now, and it has worked out well.  Just takes a little planning ahead, but it's worth it.  It makes me happy to know that I can give my family one more item they love that is not filled with preservatives.


Homemade English Muffins

2 tsp active dry yeast
1/2 tsp sugar
1 cup warm water
1/2 cup warm milk
2 1/3 cups bread flour
2/3 cup all-purpose flour
1 tsp salt

Combine yeast, sugar and half of the water in a small bowl. Stir with fork until yeast is dissolved and cover with a towel for 5 minutes, or until mixture starts to foam. Add remaining water and milk and cover for another 5 minutes.

In large bowl of electric mixer fitted with the dough hook, combine flours and salt. Add in the yeast mixture, and stir on low until just combined. Turn mixer on medium and knead for about 4-8 minutes, or until dough is smooth and soft.  Place dough into a lightly greased bowl and cover with plastic and a towel.  Allow to double in size, at least 90 minutes. The longer it's left to rise the better. I once let it rise for 4 hours and it ended up being the best batch muffins to date.

Punch down dough and remove it from the bowl onto a floured work surface. Divide into 8 equal pieces and roll each piece into a ball and place onto a cookie sheet sprayed with cooking spray and spinkled with corn meal. Cover with towel and let rise for 30 minutes.

Heat a griddle or cast-iron skillet over medium heat and lightly grease with cooking spray. Allow to cook on first side for about 10 minutes. The bottom should be dark golden brown. Turn and cook on second side for another 10 minutes.

April 7, 2012

Chicken Enchilada Pie


Hope you like the new look of the blog.  It still needs some tweaking but it's getting there.  I get bored easily, and I was sick of looking at those fall leaves!  I'll probably change the look of my blog once in a while, but I'll keep the layout the same.  Hopefully it won't confuse anyone :)

I love one dish meals.  There is something so appealing about having all the elements of a meal thrown into one dish, especially on a busy weeknight!  This chicken enchilada pie is awesome.  My husband does not care for chicken enchiladas, but for some reason he likes this dish.....go figure. My son and I both love chicken enchiladas and we both love this dish.  It's a nice change from the meat and potatoes type dinners we usually have.  It also fits the bill for an easy weeknight one dish meal AND it's husband approved - can't get better than that!

Chicken Enchilada Pie

1, 15 oz can of tomato puree
1 & ¼ tablespoons of chili powder
½ tbsp cumin
1 tsp onion powder
¼ cup olive oil
2 cups cooked and shredded chicken
1 15 oz can black beans
8 oz Monterey Jack cheese
8 tortillas
1 cup shredded cheddar cheese
¼ cup scallions, chopped

In a large bowl whisk together the first five ingredients.  Spray a pie plate with cooking spray, then spread ½ a cup of the sauce mixture in the bottom of the baking dish.  Lay 3 tortillas on top of the sauce, then spread the chicken evenly over the tortillas.  Next spread ½ of the beans and ½ of the Monterey Jack cheese on top of the chicken.  Place 3 more tortillas and spread another ½ cup of the sauce and layer on the rest of the chicken, beans and Monterey Jack cheese.  Top with the last 2 tortillas and the remainder of the sauce.  Place in oven and cook at 400 degrees for 30 minutes.  Spread the cheddar cheese on top and bake for another 5 minutes.  Remove from oven and sprinkle the green onions on top. 

Cool slightly before serving. Enjoy!

April 5, 2012

Cabbage with Kielbasa & Beans


In my quest to try a new recipe every week I came across this one for sweet and sour cabbage with kielbasa and beans.  Sounded good to me - my husband loves cabbage and it's a one dish meal, which I love.  Cabbage is so underrated....why do we wait for St. Patty's day to have it??  I know people think it's smelly, but when you cook it down it becomes so sweet and yummy.  I remember the first time I cooked cabbage, at my husband's request.  I was pleasantly surprised at what a wonderful flavor it takes on.....I had no idea it would taste so good!  As an added plus - it's good for you! 

Thank you to anediblemosaic.com for this wonderful recipe.  My family and I really liked and I will be making this again - this one is a keeper!

Cabbage with Kielbasa & Beans

2 tablespoons butter
1 tablespoon canola oil
1 lb pre-cooked lean turkey sausage (such as kielbasa), sliced
1 lb cabbage, cored and sliced into thin shreds (about 6 cups)
2 small onions, thinly sliced
6 tablespoons organic, unfiltered apple cider vinegar
2 tablespoons brown sugar, lightly packed
2 tablespoons course ground mustard
1/2 teaspoon salt
1/8 teaspoon black pepper
2 bay leaves
1 (15 oz) can cannellini beans, rinsed and drained

Heat the butter and oil in a lidded 5-quart pot over medium-high heat; add the sausage and cook until browned, about 5 to 7 minutes, stirring occasionally.  Transfer the sausage to a bowl and set aside.  Add the cabbage, onion, apple cider vinegar, brown sugar, mustard, salt, black pepper, and bay leaves to the pot and cook until the cabbage starts to soften (about 5 minutes), then turn the heat down to low, cover the pot, and cook until tender (about 30 to 40 minutes), stirring occasionally.  Stir in the sausage and beans, and cook a couple minutes to warm.  Season with salt and pepper to taste.

April 3, 2012

Suzie Q Cupcakes


It has been almost a year since my husband landed himself in the hospital with a brain aneurism.  While that was one of the most difficult and stressful situations I've gone through, we are VERY lucky to have him still with us today as if nothing ever happened.  Did you know that only 1/3 of the people who have a brain aneurism actually make it to the hospital in time to save their lives and only 1/3 of those people leave the hospital with no lasting complications?  My husband is very lucky indeed.....


Today he goes in for an angiogram to make sure everything still looks good up there.  He had one 6 months ago and everything was fine, so we are hoping for the same results today.  Since one of my husband's favorite desserts is chocolate cake, I decided to make these cupcakes to celebrate almost a year of good health for him.  

I call these "Suzie Q Cupcakes" because that is exactly what they remind me of.  I'm actually not a big fan of chocolate (I know, shocking right??) but Suzie Q's were one of my favorite treats when I was a kid!  There's just something about that filling with that rich chocolate cake......yummy.   You need to make these......run, no walk (I wouldn't want you to hurt yourself) and make these immediately! 

Suzie Q Cupcakes


For the Cake:
2 & 2/3 cups all-purpose flour
1 teaspoon baking soda

1 tablespoon baking powder
1 & 1/4 cups cocoa powder, sifted
1 teaspoon salt

1 cup unsalted butter at room temp
2 cups granulated sugar
3 large eggs
1 large egg yolk

1 tsp vanilla
2 cups ice water


Frosting:
5 cups confectioner’s sugar
scant 1/2 cup hot/boiling water
1 teaspoon vanilla extract
1/4 teaspoon salt
1 1/2 cups unsalted butter, softened

1 cup shortening

Preheat the oven to 350 degrees. 

Cake:  In the bowl of an electric mixer add the sugar and butter and mix until well blended. Add the eggs, one at a time, beating well after each addition, then add the yolk and the vanilla and mix until combined.  Add the cocoa and beat until well blended. In a separate bowl whisk the flour, baking powder, baking soda, and salt together. Add the flour mixture in 3 additions alternatively with the ice water, beginning and ending with the flour mix and beating until just blended and smooth after each addition. Spray your cupcake tins with cooking spray and divide the batter evenly.  This will make 24-30 cupcakes, depending on how much you fill them.

Place in oven and bake until a tester inserted into the center comes out clean, about 15 minutes. Cool in the pans completely before frosting.

Frosting:   Add the confectioner’s sugar to the bowl of an electric mixer. With the mixer running on low, slowly add the boiling water. Next add the vanilla and salt and mix until combined. Add the butter and shortening and continue to beat on low for about 20 seconds. Turn the mixer to medium-high and let it go for 15 minutes.  It should be very light and fluffy when done.

April 1, 2012

Sloppy Joes


Happy April Fool’s Day everyone!  Hope there were successful pranks in your day – either pulled off by you or pulled on you.  Everyone needs a day of jokes and pranks to put a smile on your face once in a while.  What’s not so funny is that I just realized Easter is in one week and I haven’t thought at all about it until now!  Uh oh, crunch time….. 

We have hunters in this family. So, I am always trying to think of ways to use up the venison we have stocked up in our freezer. Who doesn't like sloppy joes right? This is a great recipe for the ground venison - and if you aren't a fan of venison, you can of course substitute ground beef.  Either way, this is a sloppy joe recipe that everyone will enjoy, no matter what kind of meat you use. We always serve sloppy joes with Doritos – not sure why exactly, but they really do go well together. YUM!

Venison Sloppy Joes

1 lb ground venison or beef
1/2 cup ketchup
1/2 tomato puree
1/4 - 1/2 cup water
1 tbsp brown sugar
1 tsp Worcestershire sauce
2 tsp mustard
1/2 tsp garlic powder
1/2 tsp salt
1/2 onion, chopped
1 green pepper, chopped

In large skillet add a little olive oil to coat pan. Sauté the chopped onion and pepper until onions are translucent. Add meat and cook over medium heat until no longer pink, and drain off any excess fat. Stir in ketchup, tomato puree, water, brown sugar, Worcestershire sauce, mustard, garlic powder and salt. Bring to a boil, and reduce heat and simmers for about 30 minutes. Makes 4 servings.