June 30, 2012
Strawberry Rhubarb Pie
Wow, I can't believe it's June 30th already. Summer will be over before you know it...but let's not think about that right now. It's another gorgeous Saturday in Vermont, so the thought of snow right now is just plain depressing!
I finally managed to get my hands on some rhubarb and local strawberries, so my husband's wish for strawberry rhubarb pie has officially been fulfilled. Oddly, I've never made strawberry rhubarb pie before. So one of the things I do before attempting a new dish, is to read over SEVERAL different recipes and then take elements from each one that I think are important and create my own recipe. Sometimes it is successful and sometimes it's not, but to me that's the best way to find what works and what doesn't. That's what I did with this pie, and I couldn't be more pleased with the results. It really turned out perfect and I don't think there's anything I'd change about it.
We all really loved this pie. In fact, my husband said he thought it was the best pie I've ever made....although I'm pretty sure he says that every time I make a pie!
Strawberry Rhubarb Pie
3 cups strawberries, cut in half or quartered
2 1/2 - 3 cups rhubarb, chopped
3/4 cup sugar
2 tbsp minute tapioca
1 tbsp flour
1/2 tsp lemon juice
1 tsp vanilla
dash of cinnamon
dash of nutmeg
3 tbsp butter
1 recipe for 9 inch double crust (click here for recipe)
1 egg yolk
1 tbsp cream or 1/2 & 1/2
Turbinado sugar
Preheat oven to 400. In a large bowl toss the strawberries and rhubarb together with the sugar, tapioca and flour. Add the lemon juice, vanilla and a dash of cinnamon & nutmeg and stir to combine. Line your pie plate with the bottom layer of pie dough and pour in the filling. Break up the 3 tablespoons of butter and place evenly on top of the filling. Cover with the top crust and either crimp the edges all around with a fork or use your fingers. Cut 4 slits into the top crust to let the steam escape.
In a small bowl add the egg yolk and cream and stir to combine. With a pastry brush spread the egg mixture evenly over the top crust. Sprinkle the Turbinado sugar all over the top. Bake for 40-45 minutes or until bubbly and golden brown. Make sure to let pie cool completely before cutting in to it.
June 28, 2012
BBQ Sauce I
Coming up with the ultimate homemade bbq sauce recipe has been a goal of mine for a couple of years now. My favorite store bought sauce is Anna Mae's Smoky Sweet Sauce....it's sooooo good! It has the perfect amount of sweetness and spice, and it is good on everything!
Over the years my homemade sauce has evolved, and this one I've come up with is pretty darn good if I do say so myself. However, I have given it the name of "BBQ Sauce I" because I know I still have not formulated the perfect recipe just yet. So even though this sauce is a keeper, my quest continues.....
BBQ Sauce I
1/2 onion, minced
1/2 cup tomato paste
1/2 cup apple cider vinegar
1 1/2 cups water
1/4 cup brown sugar
1 tbsp honey
1 tbsp soy sauce
2 tbsp Worcestershire sauce
2 tbsp Bourban
1 tbsp molasses
2 1/2 tsp garlic powder
1/2 tsp onion powder
2 tsp salt
1/2 tsp pepper
1/4 tsp paprika
1/2 tsp red pepper flakes
2 tsp red pepper jelly
1/2 tsp hot sauce
Heat 2 tspn olive oil in a medium saucepan on medium-low, then add the onions. Cook onions for about 5 minutes while stirring. Add the rest of the ingredients and stir well to combine. Bring mixture to a boil then reduce heat and let it simmer for at least an hour, or until thickened.
* Note: As with most sauces, I find it's better on the second day, after it's had time for all the flavors to set together. However, if you don't have that kind of time it's OK to use right away and it will still be delicious!
June 26, 2012
Grilled Dill Potatoes
It's grilling season - YA HOO!! Some of you might be thinking it's no big deal, but summers are short in Vermont. Therefore, I can't help but get excited that we can be outside grilling on a warm summer day. Don't get me wrong, we grill year round, weather permitting (I should say my husband does). But during the dead of winter, the only thing he's willing to brave the cold for is a good steak on the grill. Let's face it, it's just not the same any other way.
I try to take advantage of the grilling season by cooking as much as possible on the grill. And since my husband is the one who 98% of the time works the grill, that means more time for me doing other things....like blogging. ☺
I love grilled veggies! However, the idea for these potatoes came from my Aunt Judy. When I was in Maine visiting her last summer she threw these together and they were so delicious. I had never used fresh dill before then, so at the time I was surprised she was using it on the potatoes. I'm not really sure why that surprised me, especially since I put dill in my potato salad! Anyway, ever since then I've been buying (and now growing) more fresh herbs, especially ones I hadn't really tried fresh before. You could add other fresh herbs to these potatoes or use whatever herbs are your favorite. These potatoes are simple, but oh so delicious! (PS - the potatoes pictured are not cooked....I forgot to snap a shot after cooking!)
Grilled Dill Potatoes
2 lbs of really small red potatoes, cut in half
3 tbsp good olive oil
1/2 tsp salt
1/4 tsp pepper
1 heaping tbsp fresh dill, chopped
After cutting the potatoes in half, place them on a microwave safe dish. Cook them in the microwave for 8-10 minutes - this is just to get the cooking process started. Put potatoes in a bowl and add the rest of the ingredients (3 tbsp of olive oil might seem like a lot, but they really need it when cooking on the grill). Toss everything together until the potatoes are evenly coated. Place potatoes on a flat grill pan lined with tin foil - I have a grill pan with holes in the bottom, but if you don't have one you can use a cookie sheet.
Place on the grill which has been preheating on medium heat - if your grill has a thermometer, the temperature should be around 400. Grill for about 35-45 minutes. Make sure to check on them often to stir and flip them so they get browned on all sides. You don't want them to be burned, but you do want them to be a nice rich brown and that's when they are done. Enjoy!
June 25, 2012
Banana Split Trifle
We had another beautiful summer weekend in Vermont this past weekend, and it was so nice to relax and just enjoy the weather - especially after the crazy day I had last week. My husband was out of town and my son had slept over a friends house, so I was home alone last Thursday. That meant it was my job to make sure the chickens had plenty of fresh water and food before I left for work in the morning. Since it was going to be another day of temps in the 90's, and it was already 80 degrees at 6:30 in the morning, I decided to not get my work clothes on before heading out to the chicken coop. Instead I threw on a pair of pajama shorts, a bra (that's right, I didn't bother putting a shirt on since no one was home) and mud boots and headed out to tend to the chickens. As I opened the door to the coop to put the fresh water inside, one of the chickens flew out! I then spend 15 minutes chasing her around the yard, all the while swatting at a horse fly that was buzzing around my head....I'm sure I was a quite a sight! I couldn't get her, so I went and got our dog to see if we could work together to corner her but that didn't work either. So, I decided to give up and hope that she'd still be alive when I got home later that day.
I ran in the house and threw on my work clothes. I was pretty sweaty at this point so I decided not to bother blow drying my hair, especially because I was running late, so I just tied my hair up into a ponytail and gathered my stuff together. As I stepped outside I glanced at my car in the driveway, and wouldn't you know it.....I had a flat tire! UNBELIEVABLE!!!!! I called my husband, and at this point I might have been slightly hysterical, and gave him the run down of my morning. I could tell he was holding back the laughter as he told me to sit tight while he made some calls to see if he could get someone to give me a hand with the tire. I of course contemplated changing it myself, but since I have never done it before I was a little leery of giving it a try. In the end my husband saved the day and found someone to come over to put air in the tire, which made it possible for me to drive it down the road to our local mechanic so he could plug it for me. After all that I only ended up being an hour and 15 minutes late for work....not too bad, all things considered! So again, after that day, it was nice to relax this past weekend. ☺
OK, so we should probably talk about this wonderful summer dessert. This is another recipe I stole from my mother. She made it for a family BBQ that we went to one summer, and it was a huge hit. I made sure to get the recipe from her the next time I had to bring a dessert to a cookout I was going to, and again it was huge hit. That's when I knew this recipe was a keeper! It's so simple to put together, and it is surprisingly delicious - I'm not even into banana splits, and I love this dish. Make this for your next gathering, and I promise people will be begging you for the recipe!
Banana Split Trifle serves 10-12
One Angel Food cake – feel free to make one from scratch, use a box mix, or buy a pre-made one
Vanilla Pudding – feel free to make a batch of homemade pudding, or make use 1 package of instant
3 large bananas, sliced
1 ½ cups sliced fresh strawberries
1 ½ - 2 cups chopped fresh pineapple (or a 16 oz can of crushed pineapple, drained)
¼ cup chocolate syrup
1 container of whipped topping, thawed (you could make whip cream from scratch but it wouldn’t hold up well after the dessert sets)
½ cup walnuts
Prepare the cake and make sure it’s completely cooled before assembling the dessert. While the cake is baking, make the pudding and make sure it has set before assembling.
When you are ready to assemble the dessert, cut the cake in half. In a trifle dish (or large salad bowl) break up half of the cake into bite-size pieces. Top the cake pieces with half of the pudding, half of the bananas half of the strawberries, half of the pineapple, half of the chocolate syrup, half of the whipped topping and half of the nuts. Repeat all these steps with the remaining ingredients in the same order. Chill until ready to serve.
June 23, 2012
Red Pepper Jelly with Cream Cheese
Many years ago, when I was in college I believe, I was home for Christmas and we had family over for dinner. My mom put out this appetizer, cream cheese with some weird jelly on it. I said to her "What the heck is that?" and she replied "Just try it!" I was very skeptical, so I waited to see if everyone else was going to eat it. My uncles all dove into it, so I figured it was safe enough to try (I wasn't very food adventurous back then).
I was pleasantly surprised at how yummy it was! At the time I had never even heard of Red Pepper Jelly, so who knew it would pair so well with cream cheese on a cracker??? I don't know where she got the idea/recipe from but I never forgot it and now I serve it often before a holiday meal.
If you like a little kick, instead of using Sweet Red Pepper Jelly, pick one that has some heat in it. Today we are headed to the farmer's market in Burlington, so I'm going to try some jelly samples and see if there's a different flavor out there that might be fun to use for next time I serve this. Give this a try - I guarantee your guests will gobble it up!
Red Pepper Jelly with Cream Cheese
1 jar of Sweet Red Pepper Jelly (my favorite brand is Fire in the Mountains)
1 block of cream cheese, at room temperature
Crackers (whatever kind is your preference)
Put block of softened cream cheese in the middle of serving platter. Spoon Red Pepper Jelly generously all over the top of the cream cheese. Arrange crackers around the cream cheese. Spreading the cream cheese with the jelly on top of the crackers makes for a delicious appetizer.
June 21, 2012
Perfect Meatballs
Who
doesn't love a good meatball, right? A lot of recipes for meatballs say
to use a mix of beef, pork and veal. There was a time when I would ignore
those recommendations. Then one day I decided I wanted to make the ultimate
meatball, something really special...something above and beyond any other
meatball I've made before. So, I decided to try the 3 meat mixture in my
regular meatball recipe to see if it would make a difference.
Can
I just say that I was AMAZED at the results! Who knew it would make THAT
much of a difference???? Obviously lots of chefs out there know that
the mixture of different meats makes a huge difference, but this was a ground
breaking discovery for me! The texture is softer and way more
delicate, and the taste was noticeably better – much more flavor. I
WILL NEVER MAKE MEATBALLS WITH JUST GROUND BEEF AGAIN!
If
you are like me and didn’t think using the three different meats would make
much of a difference, I am here to tell you that it does and you must try it to see for yourself.
Perfect Meatballs
1 lb ground beef
½ lb ground pork
½ lb ground veal
¾ cup panko bread crumbs
½ cup grated Parmesan cheese
¼ cup seasoned bread crumbs
1 tsp chopped garlic
1tbsp chopped fresh parsley (or 1 tsp dried parsley)
1 tbsp chopped fresh basil (or 1 tsp dried basil)
¾ tsp salt
½ tsp pepper
¼ tsp nutmeg
1 large egg, beaten
¾ cup warm water
Preheat oven to 350. Line a cookie sheet with tin foil and spray with cooking spray. Add all ingredients to a large bowl. Combine gently with your hands (or fork if you prefer). Form into 2-inch meatballs and place on cookie sheet. Place in oven and cook for 20-30 min. After 20 minutes cut into a meatball to see if they are cooked thru (it’s OK if they are slightly pink in the middle because they will continue to cook a little when you take them out).
June 19, 2012
Becca's Granola
Hope
you all had a wonderful Father’s Day! We
had a nice weekend visiting with family, and the weather couldn’t have been
more perfect. Summer in Vermont really
is beautiful. I’m a lucky girl to live
here, especially in the town we live in.
It’s just so darn cute! It’s one
of those small towns that you drive through when you are on vacation and you
look around and think “Man, it must be nice to live here!” It’s exactly the kind of town I always wanted
to live in.
For
some reason it seems Vermonters really know how to make granola. If you go to a farmer’s market there’s always
someone selling it, and it’s always so yummy.
It’s one of those things that I wish I could make well because it is
such a fun and healthy snack. Granola
has so many uses – have it for breakfast on yogurt, a small bowl for snack, topping
on ice cream, etc. For me, I tend to
make it when I know I’m going to have company staying overnight. It’s nice to have around for people to pick
at.
I
have tried several recipes over the years for granola, and honestly none of
them have turned out that great. This
recipe was given to me by a former co-worker of mine. She gave me a jar of granola with the recipe as
part of my Christmas gift one year, and I was thrilled. She said she and her daughter spent an entire
day, or was it an entire weekend, making granola and trying to find the perfect
recipe. Well, let me tell you – they
succeeded! I couldn’t stop eating
it. Nice job Becca! I will treasure this recipe forever ♥
Becca’s Granola
4
cups rolled oats (not instant)
1
cup raw wheat germ or flax
1/3
cup brown sugar
½
tsp salt
½
cup sliced almonds
½
cup raw sunflower seeds
1
tbsp cinnamon
1
cup dried fruit (I used dried cranberries) – this is to be added after 30 minutes of cooking
½
cup maple syrup (Vermont maple syrup is best)
6
tbsp vegetable oil
2
tbsp water
2
tsp vanilla
Preheat
oven to 275. Mix the first 7 ingredients
together in a bowl. In a pan, add the
maple syrup, oil, water and vanilla and heat until bubbling slightly – no need
to let it come to a complete boil. Stir
it into the oat mixture. Divide mixture
equally and spread out onto two cookie sheets.
Bake for 30 minutes and remove from oven and add the dried fruit,
stirring to combine. Bake for 15
minutes, and stir again. Bake another 15
minutes and it’s done! Cool completely
before storing in an air tight container.
June 18, 2012
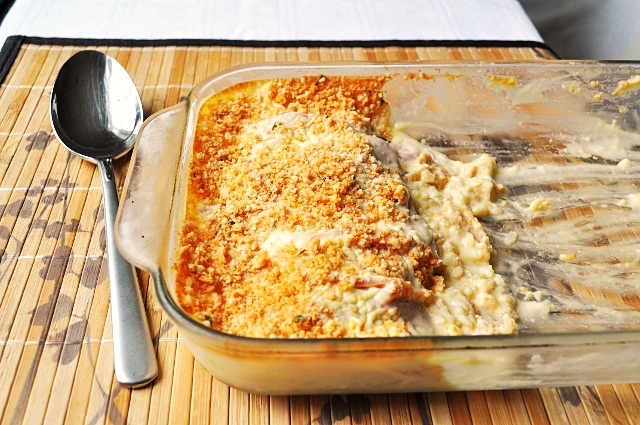
Chicken Cordon Bleu Casserole
I love chicken. I could eat it everyday....maybe even twice a day. My husband on the other hand, not so much. Don't get me wrong, he likes chicken well enough, but he'd prefer red meat. Since eating red meat everyday isn't exactly healthy, I make him eat chicken at least once a week (don't worry, that doesn't mean we eat red meat the other 6 days).
Until recently, his favorite chicken dish was Chicken Cordon Bleu. His new favorite chicken dish, in case you are interested, is Jalapeno Popper Stuffed Chicken (click here for the recipe). Anyway, I've had this chicken cordon bleu casserole recipe on stand-by for a while now so I finally decided it was time to give it a try.
Thankfully, we all liked this dish. I say "thankfully" because during the week I'd much rather throw all the ingredients into a casserole than to take the time to put it together the traditional way. Don't get me wrong, the traditional chicken cordon bleu is worth the effort when you have the time. The big surprise was that my husband told he preferred this casserole over the traditional version. YES! That makes this one a keeper ☺
Chicken Cordon Bleu Casserole
2 cups
cooked rice
3
cups cooked chicken, cut into bite sized pieces
6
slices Swiss cheese
10
slices ham
1
can cream of chicken soup
¾
cup milk
¼
cup sour cream
1
tbsp butter, melted
2 tbsp Italian style bread crumbs
Preheat
oven to 350, and spray an 8 x 11 baking dish with cooking spray. Spread the cooked rice over the bottom of the
baking dish, and arrange chicken on top of rice. Place the Swiss cheese on top of the chicken,
then layer the slices of ham on top of the cheese. Mix the soup together with the milk and sour cream, and spread evenly over the
ham. In a separate bowl mix the melted
butter with the bread crumbs and sprinkle it on top of the soup mixture. Place in oven and bake for 30-35 or until hot
and bubbly.
June 17, 2012
Strawberry Cheesecake Muffins
My son is officially on summer vacation, which means I have to step up the homemade goodies because he is at the age where he is hungry aaallllllllll the time! To top it off, he broke his foot on the last day of school, so of course I feel terrible for him and want to cheer him up. This means more goodies! I know what it's like to have to wear a cast during the summer, and let me tell you it's pretty much the worst thing ever! My poor, not so little, baby.
Last week I took to the Internet to look for new goodies to try. I came across a wonderful blog that had this muffin recipe on there. It's a great blog with lovely pictures, and after reading it I knew I needed to try the recipe (click here if you are interested in checking out her blog).
These muffins were not at all how I expected them to be. They are super tasty, but after eating one I couldn't decide if they fall into the "snack/breakfast" category or the "dessert" category. Guess it doesn't really matter, we'll eat them either way! We all thought these were good, however if I'm going to be honest, I don't know how often I'd make them just because it's a little more involved than your average muffin recipe. However, I will definitely make them again at some point because they really are quite yummy.
Strawberry Cheesecake Muffins from Food Wanderings in Asia
Batter:
2 cups all purpose flour
1/2 cup granulated sugar
2 tsp baking powder
1/2 tsp salt
1 egg
1/4 cup canola oil
1 cup whole milk
1 tsp vanilla extract
2 cups strawberries, cut into small
pieces
Cream
Cheese Filling:
4 ounces cream cheese
1/3 cup granulated sugar
2 tbsp beaten egg
1 tsp vanilla extract
Cinnamon
Streusel:
1/4 cup all purpose flour
1/4 cup granulated sugar
1 tsp cinnamon
2 tbsp butter, cold
Preheat the oven to 400F. Line a 12
cup muffin pan with cupcake liners. Set aside.
Streusel Topping: Sift the flour, sugar and cinnamon together in
a bowl. Whisk together. Add the cold butter and mix with a fork until the
mixture looks like coarse wet sand. Set aside.
Cream Cheese Filling: Beat cream cheese, egg, sugar and
vanilla in a bowl until smooth.
Muffin Batter: Sift the flour, baking powder and salt in one
bowl. Whisk together. In another bowl, beat the milk, oil, egg and sugar. Stir
the dry ingredients into the milk mixture gently. Do not over mix. The muffin
batter will be slightly lumpy.
Scoop a tablespoon of the muffin
batter into each cupcake liner. Sprinkle a few pieces of strawberries. Add a
dollop (about a heaping teaspoon) of the cream cheese filling. Sprinkle a
little of the cinnamon streusel on top of the filling, followed by another
layer of the muffin batter. Add a few more pieces of strawberries. Lastly,
sprinkle the cinnamon streusel on top.
Bake for 25 minutes or until a
toothpick inserted in the middle comes out clean. Cool in the pan for 5
minutes. Remove and transfer to a wire rack to cool completely. Serve warm with
a cup of tea or coffee.
June 14, 2012
Fudgey Brownies
Brownies are a funny thing aren't they? There are so many variations - cakey, thick, thin, fudgey. Everyone has their own personal preference. I think for me I've been trying to find the perfect combination of fudgey and still have it be thick and slightly cakey (if that makes sense). I don't make brownies very often, but I would still like to find, what I consider to be the ultimate recipe.
In the past I've tried a recipe from the King Arthur website that I thought came out really good....almost exactly what I've been trying to find. Yet, for some reason I feel the need to keep trying different recipes, just to see if there's something better out there. This time I tried Dave Lebovitz's recipe for the "Best Brownies".
These came out really good...if you like fudgey brownies. Overall, I'd give this one two thumbs up. Definitely good brownies, for sure! For me, I'm still not completely satisfied though, so I'll probably give one or two more recipes a try....just to see if I can find something even better. Or maybe I just have some kind of illness that makes me obsess over finding the "perfect recipe" for everything! Probably a little of both ☺
Dave Lebovitz's Best Brownies
6 tbsp butter
8 oz semisweet chocolate, chopped
3/4 cup sugar
1 tsp vanilla
2 large eggs, at room temp
1/4 cup all-purpose flour
1 cup chopped walnuts or pecans
Preheat oven at 350, and spray an 8 x 8 pan with cooking spray. Melt the butter In a medium sauce pan over low heat. Add the chocolate and stir until melted. Remove the pan from the heat and stir in sugar and vanilla. Beat in the eggs one at a time until combined.
Add the flour and stir vigorously for an entire minute (time yourself). The mixture should go from grainy to smooth and glossy, and it will pull away from the side of the pan. Stir in the chopped nuts. Pour into the prepared pan and bake for about 30 minutes, or until center is almost set. Do not over bake. Cool completely in the pan before cutting into squares.
June 12, 2012
Pizza Casserole
Sick of making the same dishes every week? Sick of ordering pizza when you can't think of anything else to have? We all have weeks like that right? I am constantly searching for new dinner ideas, and always trying to think of new things to throw together.
As I've mentioned before, I have a soft spot for casseroles. Don't know why, but I really love a one dish meal, especially during the week. I came across a recipe a while ago for a little bit of a different version of a pizza casserole and realized right away that it was a great idea, and so easy to tweak to your personal preferences in terms of "toppings". It was a hit in our house, and every time I've made it sense then I have changed it, depending on what kind of "pizza" I was in the mood for. The possibilities are endless with this dish, so I'll give you a basic recipe to start you off with.
Change it up and get creative. There are no rules with this dish!
Pizza Casserole
1/2 a box of bow tie pasta, cooked until al dente and drained
1, 26 oz jar spaghetti sauce (use homemade sauce if you have it)
1/2 of a large onion, chopped
2 tsp chopped garlic
1 tsp oregano
1/2 lb sweet Italian sausage
1/2 lb cooked ham, cut into cubes
1 container of sliced mushrooms, whatever kind you prefer (I use baby Portabella)
2, 8 oz bags shredded mozzarella
sliced pepperoni - amount to use is up to you
grated Parmesan cheese - amount to use is up to you
Crumble up the sausage in a medium sized pan, and add the onion,garlic and oregano. Cook until the juices run clear.
Spray an 8 x 11 pan with cooking spray, and preheat the oven to 375. Coat the bottom of the pan with a thin layer of sauce. On top of the sauce add 1/3 of the pasta, 1/3 of the sauce, 1/3 of the shredded mozzarella, sprinkle a little of the Parmesan cheese on top of the mozzarella, add the sausage mixture, and then add 1/2 of the package of mushrooms. For the next layer, add 1/2 of the remaining pasta, 1/2 of the remaining sauce, 1/2 of the remaining mozzarella, sprinkle on the Parmesan cheese, add the ham and the rest of the mushrooms. For the final layer add the rest of the pasta, all of the remaining sauce, the rest of the mozzarella cheese, sprinkle on some Parmesan cheese and cover the top completely with a layer of pepperoni.
Place in oven and bake for 45 minutes. Remove from oven and let it set for 5-10 minutes before serving.
June 10, 2012
Vermont Vinaigrette
I love to make my own salad dressing. Vinaigrettes are my favorite because they are lower in calories, and personally I just like them better.
This recipe comes from the kitchen where I used to work. It was the most requested dressing that I made there, and there were some regulars that were very disappointed if it was not available. I don't know why exactly it's called "Vermont Vinaigrette", but if I had to guess I'd say it's because it has a very earthy flavor to it. It's full of herbs which gives it such a distinct flavor. The ingredients in this dressing blend together so nicely, and it really has a flavor like no other dressing I've ever had.
If you enjoy making your own dressing, I highly suggest giving this one a try. Besides balsamic vinaigrette, this one is a favorite of mine. This recipe makes a lot of dressing, so feel free to cut it in half if you don't need a lot of it.
Vermont Vinaigrette
6 cloves/tsp chopped garlic
¼ cup mustard
1/8 cup honey
1 ¼ cup salad oil
½ cup apple juice
1 tbsp dill
½ tbsp thyme
1 tbsp salt
1 tsp pepper
Put all ingredients together in an airtight container (jar with lid) and shake like crazy until well combined.
June 8, 2012
Aunt Judy's Bostonian Blueberry Muffins
See, I told you there would be more recipes featuring blueberries this week! This recipe is very near and dear to my heart, as it comes from my beloved Aunt Judy. Aunt Judy lives in Maine, and I spent lots of summers as a child in Maine visiting her and the rest of her family. I have so many fond memories of those days. She always had me helping her in the kitchen and I think that's where my love of cooking stems from.
My son, who turns 14 in July, also visits my Aunt Judy every summer. He usually spends about two weeks with her and my Uncle Rick, and he looks forward to it every year. They live on a lake so it's two weeks of fun in the sun swimming, hanging out with the girl down the road, and staying up late watching the Red Sox with Uncle Rick. He loves it as much as I always did as a kid.....let's face it, I STILL love going every year too! My Aunt and I are kindred spirits - we have so much fun visiting together, drinking wine and being silly. I can't wait to get my Aunt Judy fix!
Aunt Judy's Bostonian Blueberry Muffins
1/2 cup sugar
1 tbsp baking powder
1/2 tsp salt
1/2 tsp cinnamon
1 & 1/2 cups blueberries
1/2 cup butter, melted then cooled
1/2 cup milk
2 eggs
1/2 tsp vanilla
Preheat oven to 425. Grease and flour muffin tins. Combine dry ingredients. In a separate bowl toss 1 tbsp of dry ingredients with the blueberries to coat, and set aside.
Combine cooled butter with the milk, eggs and vanilla. Add to dry ingredients and stir just until moistened (mixture will be thick). Fold in the blueberries. Spoon batter in to muffin tin. Fill to top and sprinkle with sugar.
Bake for 15 minutes or until golden brown. Let stand 5 minutes before removing from pan. Makes 12 muffins.
June 6, 2012
Chocolate Cake
It's always a good time for cake right? Whether you are having a bad day, or you are having a celebration, or for no reason at all - cake makes it better. Pair it with a tall glass of milk, and you will forget all that's wrong with the world......
This cake makes me happy because it reminds me of my favorite childhood treat - Suzie Q's. A few months ago I made Suzie Q cupcakes and I loved it so much that I decided to make a cake with that recipe. A dense cake, with a light whipped frosting. It's heaven. Oh yeah, one bite and nothing else mattered......just me and my cake ☺
Chocolate Cake
2 & 2/3 cups all-purpose flour
1 teaspoon baking soda
1 tablespoon baking
powder
1 & 1/4 cups
cocoa powder, sifted
1 teaspoon salt
1 teaspoon salt
1 cup unsalted butter
at room temp
2 cups granulated sugar
3 large eggs
1 large egg yolk
2 cups granulated sugar
3 large eggs
1 large egg yolk
1 tsp vanilla
2 cups ice water
2 cups ice water
Frosting:
5 cups confectioner’s
sugar
scant 1/2 cup hot/boiling water
1 teaspoon vanilla extract
1/4 teaspoon salt
1 1/2 cups unsalted butter, softened
scant 1/2 cup hot/boiling water
1 teaspoon vanilla extract
1/4 teaspoon salt
1 1/2 cups unsalted butter, softened
1 cup
shortening
Preheat the oven to
350 degrees. Grease and flour 2, 9 or 10 inch cake pans and set aside.
Cake:
In the bowl of an electric mixer add the sugar and butter and
mix until well blended. Add the eggs, one at a time, beating well after each
addition, then add the yolk and the vanilla and mix until combined. Add the cocoa and beat until well blended. In
a separate bowl whisk the flour, baking powder, baking soda, and salt together.
Add the flour mixture in 3 additions alternatively with the ice water, beginning
and ending with the flour mix and beating until just blended and smooth after
each addition. Divide the batter
evenly between the two cake pans.
Place in oven and bake until a tester
inserted into the center comes out clean, about 25-35 minutes. Cool in the pans
completely before frosting.
Frosting: Add the confectioner’s sugar to the
bowl of an electric mixer. With the mixer running on low, slowly add the boiling
water. Next add the vanilla and salt and mix until combined. Add the butter and
shortening and continue to beat on low for about 20 seconds. Turn the mixer to
medium-high and let it go for 15 minutes.
It should be very light and fluffy when done.
June 5, 2012
Blueberry Cheesecake Bars
My poor husband has been requesting strawberry rhubarb pie for a couple of weeks now. I set out this past weekend to make him one, however once again he ended up out of luck. I couldn't find rhubarb anywhere! Not even at the grocery store....what's up with that???
So I had to go with plan B, which was blueberry cheesecake bars. I came across this recipe a few weeks ago and I haven't been able to stop thinking about making them. I have been wanting to attempt cheesecake again (since all my previous attempts over the years have all failed) so I figured this would be a good place to start. I also have an over abundance of blueberries (as a result, this won't be the last recipe you'll see this week from me featuring blueberries), so this seemed like the perfect dessert for the weekend.
Boy, am I glad I couldn't find rhubarb! These bars were divine - we all loved them!!! Super easy recipe, and a "cheesecake success" for me....YIPPEE! I will have to try it using a different fruit next time, like maybe strawberries. So excited to add this to my ever growing list of favorite recipes!
Don't worry babe, I'll find rhubarb and bake you that pie real soon ☺
Blueberry
Cheesecake Bars (adapted from www.inspiredtaste.net)
Crust:
9 graham cracker rectangles
2 tablespoons sugar
1/4 cup unsalted butter, melted
Cheesecake
Filling:
2 packages (8 oz each) cream cheese, softened
2 eggs
1 tablespoon grated lemon zest
2 tbsp fresh lemon juice
1/2 cup granulated sugar
1 1/2 cups fresh blueberries
Streusel
Topping:
1 cup packed light brown sugar
3/4 cup all-purpose flour
6 tablespoons cold unsalted butter
Heat oven to 325°F then lightly spray an 8- or 9-inch square
pan with non-stick cooking spray.
Place graham crackers into the bowl of a food processor with
2 tablespoons of granulated sugar, then cover and process until fine crumbs
form. Add the melted butter then cover and process until the cracker crumbs are
evenly moistened. Press graham cracker crumb mixture evenly into the bottom of
the pan and bake 10 minutes until lightly toasted. Cool 10-15 minutes.
To make the cheesecake bar filling, add the cream cheese,
eggs, 1 tablespoon lemon zest, the lemon juice and 1/2 cup of granulated sugar.
Cover and process until smooth and creamy. Pour cheesecake filling over crust,
and then top with blueberries.
Make the streusel topping by adding brown sugar, flour and
cold butter to a medium bowl and use a fork or your fingers to cut in the
butter until mixture becomes crumbly, and then sprinkle over filling.
Bake for about 45 minutes or until topping is lightly
browned and center is almost set (center will jiggle slightly when
moved). Cool 1 hour at room temperature,
then refrigerate for at least one hour before serving.
June 3, 2012
Crab Cakes
In a recent Cooks Illustrated magazine there was a recipe for crab cakes. I will confess that I never even tried one until I met my husband, and it's not something I would ever order when out to eat. However, my husband loves crab cakes, so I figured I'd try making them at home. After reading the recipe and looking at several others, I decided to use the Cooks Illustrated recipe as a starting point and then altered it.
My version came out very good, if I do say so myself! I would definitely make these again, but would probably only on special occasions because crab is not cheap!! I'd like to explore other dipping sauces too. This one was good, but I feel there's room for improvement. One thing I learned from making these at home - do not reheat them in the microwave!
Crab Cakes
1lb lump crab meat (if you can't get fresh crab, use Phillips Premium Jumbo Crab)
1 cup milk
1/2 cup chopped scallions
1 tbsp fresh dill, chopped
1/2 cup plain Panko bread crumbs
2 tsp Dijon mustard
1 tsp lemon juice
2 tsp Old Bay seasoning
1/2 tsp salt
1/4 tsp pepper
1 egg
1/4 cup flour
1/4 cup vegetable oil
Place crab meat in a bowl and add the milk, making sure the crab is completely covered with the milk. Cover and refrigerate for 30 minutes. After 30 minutes, drain the crab and add it to a large bowl.
To the crab meat add the scallions, dill, bread crumbs, Dijon mustard, lemon juice, Old Bay seasoning, salt & pepper and stir gently to combine. Add the egg and fold it into the mixture until it starts to cling together. Divide into 6 equal parts, and shape into round flat patties. Place on baking sheet lined with wax paper. Cover and refrigerate for at least 30 minutes, or up to 24 hours.
When ready to cook, heat oil in a large skillet over medium-high heat until hot but not smoking. Place flour on a plate and dredge each crab cake in the flour on both sides. Place gently into hot skillet and fry until the outside is crisp and browned, about 5 minutes per side. Serve immediately with dipping sauce.
Dipping Sauce: Place 1/2 cup a mayonnaise, 1 tsp of Dijon mustard, 2 tsp sweet pickle relish, 1 tsp chopped garlic, 1 tsp hot sauce, 1 tsp fresh lemon juice, and a dash of salt in pepper into the bowl of a food processor. Pulse to combine, about 10 one second pulses. Transfer to a serving bowl.
Subscribe to:
Posts (Atom)